Proszę, nie blokuj reklam na naszej stronie. Kliknięcia w reklamy pomagają nam istnieć, rozwijać się i stawać się bardziej przydatnymi dla Ciebie!
Montaż zaworu grzybkowego
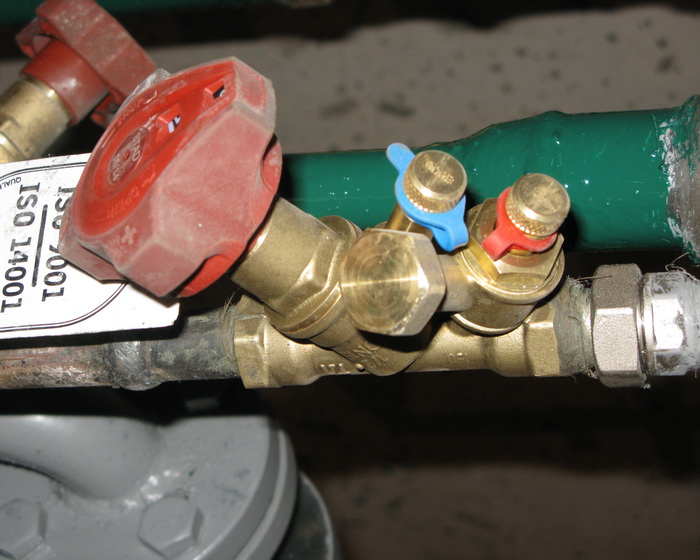
- Zawór grzybkowy można zamontować w dowolnej pozycji względem poziomu, pod warunkiem, że zapewniony jest swobodny dostęp do konserwacji i napraw.
- Kierunek przepływu wody przez zawór musi odpowiadać strzałce na korpusie. Długotrwałe użytkowanie przy odwrotnym kierunku przepływu może doprowadzić do zerwania grzyba.
- Podłączone rurociągi muszą być współosiowe, a korpus zaworu nie może być poddawany skręcaniu, rozciąganiu, zginaniu ani ściskaniu.
- Nie wolno instalować podpór bezpośrednio pod korpusem zaworu.
- Koniec gwintu rurociągu nie może wciskać się w koniec gwintu zaworu.
- Do uszczelnienia połączenia gwintowanego można użyć: lnu, taśmy teflonowej, uszczelniacza lub kleju.
- Nie dopuszcza się wycieków przez połączenie gwintowane lub trzpień zaworu.
- Zaworów grzybkowych z korpusem żeliwnym nie wolno montować na rurociągach narażonych na wibracje.
- Nie wolno wykonywać prac spawalniczych w pobliżu zaworu grzybkowego.
- Po zakończeniu montażu należy przeprowadzić próby hydrauliczne odcinka. Ciśnienie próbne nie może przekraczać ciśnienia próbnego ustalonego dla każdego z badanych elementów. Podczas prób hydraulicznych zawory odcinające, z wyjątkiem zaworów spustowych i odcinających, muszą być całkowicie otwarte.
Sekwencja pakowania połączenia gwintowanego
1. Weź włókno lniane o takiej ilości włókien, aby w stanie skręconym jego średnica była w przybliżeniu równa głębokości gwintu. Długość włókna powinna pozwalać na wykonanie 1,5-2 razy więcej nawinięć niż ilość zwojów gwintu.
2. Cofnij się o około 50-70 mm od początku włókna, lekko je skręć i włóż w pierwsze zwoje gwintu, a następnie mocno nawijaj długi odcinek włókna zgodnie z ruchem wskazówek zegara, umieszczając go w każdym zwoju gwintu.
3. Po dotarciu do końca gwintu, kontynuuj nawijanie drugą warstwą, przesuwając zwoje w kierunku początku gwintu. Długość drugiej warstwy powinna wynosić około 2/3 długości gwintu.
4. Pozostały koniec włókna (50-70 mm) należy nawinąć w podobny sposób zgodnie z ruchem wskazówek zegara, od końca gwintu do jego początku.
5. Nałóż warstwę uszczelniacza na powierzchnię nawinięcia.
6. Ręcznie wkręć elementy połączeniowe. Przy prawidłowym pakowaniu, zamontowany element powinien być wkręcony na 1,5-2 obroty.
7. Kontynuuj wkręcanie elementu kluczem lub kluczem dynamometrycznym. Jeśli zamontowany element musi być ustawiony w określonej pozycji, zakończ wkręcanie w pożądanej pozycji.
Przy prawidłowym pakowaniu, siła podczas dokręcania nie powinna przekraczać momentu dokręcania podanego poniżej:
| DN15 | DN20 | DN25 | DN32 | DN40 | DN50 | DN65 | DN80 | DN100 |
|---|---|---|---|---|---|---|---|---|
| 70 Nm | 95 Nm | 120 Nm | 150 Nm | 190 Nm | 230 Nm | 280 Nm | 350 Nm | 400 Nm |


pytanie : komentarz : opinia
219
 Katalog
 zaworów grzybkowych
Valtec RUS
ГОСТ
ГОСТ
ГОСТ
Herz
Herz
Herz
Danfoss
Danfoss
ARI Armaturen
Honeywell - Resideo
Oventrop
Danfoss
Zetkama
Oventrop
Oventrop
Oventrop
Honeywell - Resideo

