Por favor, não bloqueie os anúncios em nosso site. Cliques nos anúncios nos ajudam a existir, crescer e se tornar mais úteis para você!
Montagem do regulador de diferencial de pressão
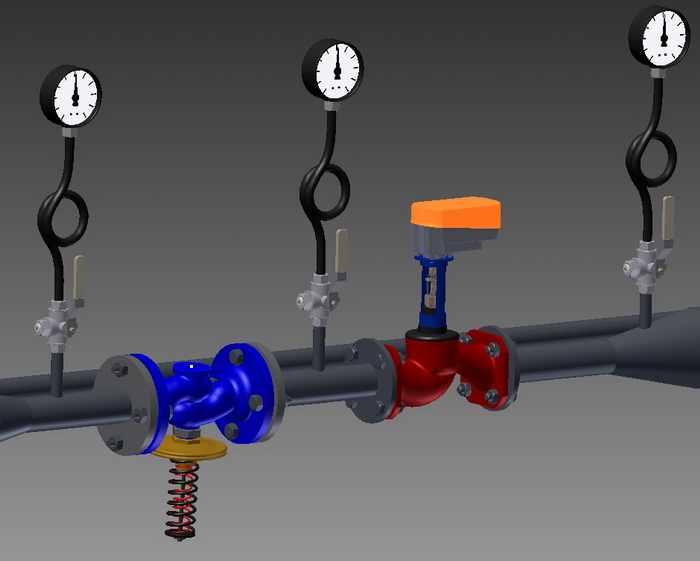
Instalação do regulador de diferencial de pressão deve ser realizada de acordo com as instruções de instalação, levando em conta as seguintes recomendações:
- Manômetros devem ser instalados antes e depois do regulador.
- Um filtro em Y deve ser instalado antes do regulador de diferencial, na direção do fluxo de água.
- Para a instalação em tubulações que transportam água de alta temperatura, pode ser necessário um resfriador de impulsos e um resfriador de haste.
- Diversos fabricantes fornecem recomendações diferentes, mas, em geral, recomenda-se prever seções retas de 5DN antes e 10DN depois do regulador durante a instalação.
- Para a maioria dos reguladores de diferencial de pressão, a posição de instalação recomendada em temperaturas superiores a 80°C é horizontal com o atuador de membrana voltado para baixo; em temperaturas abaixo de 80°C, a instalação pode ser em qualquer posição.
Sequência de embalagem da conexão roscada
1. Pegue um feixe de fibra de linho de uma espessura suficiente para que o diâmetro do feixe torcido seja aproximadamente igual à profundidade da rosca. O comprimento deve permitir um enrolamento de 1,5 a 2 vezes o número de voltas da rosca.
2. Comece aproximadamente 50-70 mm da extremidade, torça ligeiramente o feixe e posicione-o na primeira volta da rosca. Segurando-o firmemente, enrole-o no sentido horário, posicionando-o em cada volta da rosca.
3. Ao chegar ao final da rosca, continue o enrolamento voltando em direção ao início da rosca, cobrindo cerca de 2/3 do comprimento da rosca com uma segunda camada.
4. Enrole a extremidade restante do feixe (50-70 mm) no sentido horário, da extremidade da rosca até o seu início.
5. Aplique uma camada de vedante na superfície da embalagem.
6. Aperte manualmente os elementos de conexão. Com uma embalagem adequada, o elemento deve apertar em 1,5-2 voltas.
7. Use uma chave ou chave de torque para continuar apertando. Se o elemento precisar de uma posição específica, finalize o aperto na posição desejada.
Com uma embalagem adequada, o torque de aperto não deve exceder os valores abaixo:
| DN15 | DN20 | DN25 | DN32 | DN40 | DN50 | DN65 | DN80 | DN100 |
|---|---|---|---|---|---|---|---|---|
| 70 Nm | 95 Nm | 120 Nm | 150 Nm | 190 Nm | 230 Nm | 280 Nm | 350 Nm | 400 Nm |
Torques de aperto para parafusos de flange
| DN | Parafuso/Porca | Torque, Nm |
|---|---|---|
| 15 - 32 | M 10 | 15 - 30 |
| 40 - 65 | M 12 | 35 - 50 |
| 80 - 100 | M 16 | 75 - 100 |
| 125 - 150 | M 16 | 80 - 120 |
| 200 | M 20 | 150 - 200 |
| 250 - 400 | M 24 | 340 - 410 |
| 500 | M 27 | 340 - 410 |


 Tutorial Danfoss
pergunta : comentário : opinião
275
 Catálogo de
 reguladores de diferencial de pressão
Danfoss
Danfoss
Danfoss
Danfoss
Danfoss
Danfoss
LDM
LDM
LDM
Herz
Herz
IMI Hydronic
IMI Hydronic
IMI Hydronic
IMI Hydronic
Clorius
Clorius
Samson
Samson
Samson
Samson
Oventrop
Oventrop
КПСР Групп
IMI Hydronic
IMI Hydronic
Broen
Broen
Samson
Samson

